Overview
To receive Onix intakes, we had to provide an SFTP server. On this SFTP server, is where the content source (Bookwire, Ingram) sends all the content that they provide. The problem is that they send GBs of data.
To solve this problem and make our lives easier, we are using an AWS service called AWS Transfer Family, which provides an SFTP like server that is connected to an S3 bucket.
You will be able to find the S3 bucket under the Content Intake account in AWS. The bucket names follow the format {tenant_name}-sftp-content.
There you will find thousands of files. The basic logic "folder structure" is as follows:
- The files of the books are in the root folder. They follow the
isbn.extensionschema (Ex:9780147546777.epub). Here you fill find.epub,.pdf,.mp3and.jpgfor each book that we have access to. - The Onix files are located under the
/data"folder".
Bookwire folder structure varies a bit. Since they share the content after ingesting it, we need a way to know to which store we should share it. For that reason, we use a different subdirectory for each store, inside /data. i.e: if the Onix file is placed at /data/store_1234, the content will be send to BW tenant and then shared with the tenant ID 1234
You can read more about Ingram's CS Core Source Program that we are part of here.
Aditionally, most ONIX systems are prepared to send email notifications about new content, content updates and content withdrawls. We deliver an specific email address for each integration. The address has this format marketplace.intake.{customer}@publica.la, for example marketplace.intake.fonolibro@publica.la or marketplace.intake.bookwire@publica.la. All these addresses are currently an alias of fgilio@publica.la and the emails are automatically labeled and archived, in the future we could send them anywhere else.
Create onix medusa intake and AWS Bucket
IMPORTANT: The manual process described below in the "(deprecated) create it from scratch" section is no longer used. All SFTP server creation, AWS bucket setup, IAM policies, roles, and credentials are now handled automatically through the Nova Content Intake form.
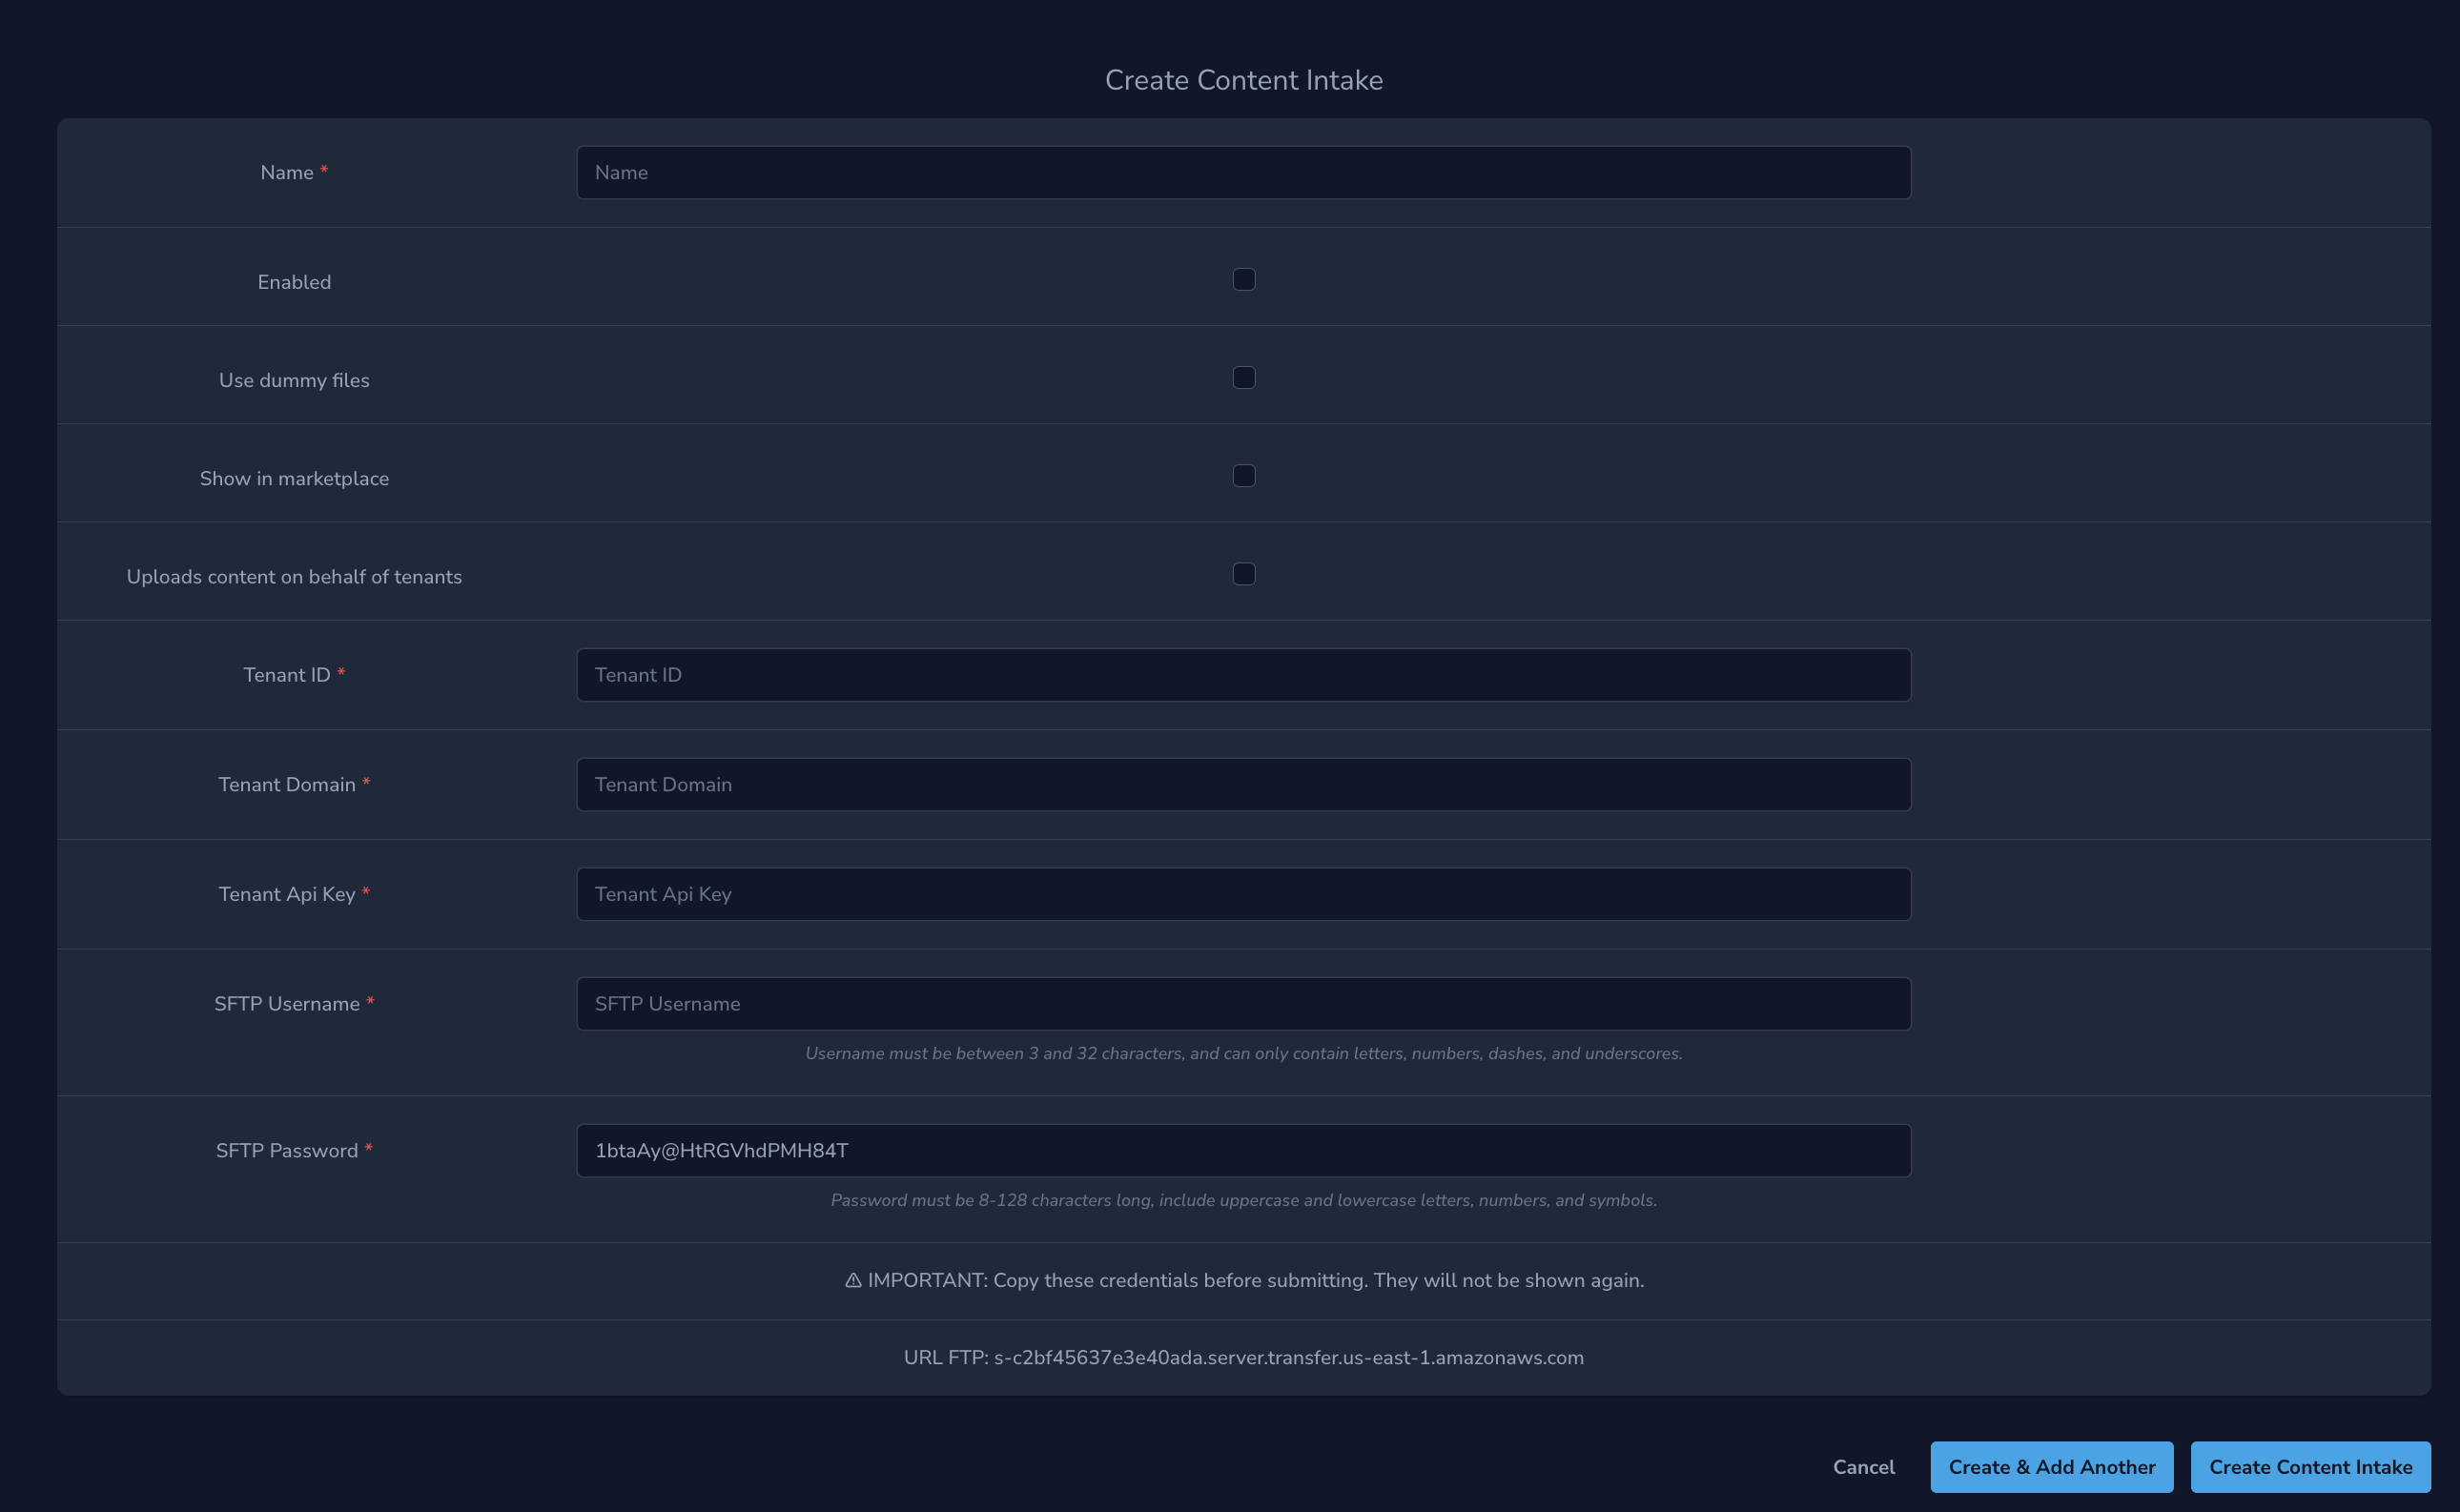
The creation of the Onix Medusa Intake, the AWS Bucket with its roles and permissions, and the generation of SFTP access credentials are all done in a single step by filling out the Nova form called Content Intake.
Steps to complete before filling out the form:
- Create a tenant if this doesn't exist. We need to take note of
idanddomainto use in the step 4. - Create an user
onix-intake@publica.lalike admin using the SFTP password like user password (save this data in 1password). Then login with it and create an api-key (this is because is not posible inpersonate using publica.la accounts). - Create the email address alias for that new intake, following the
marketplace.intake.{customer}@publica.laformat.
Content Intake Configuration Options
When creating the content intake in Medusa, you can configure the following options:
Processing Options:
- Enabled: Enabled content intakes will be processed automatically. When disabled, you must process them manually.
- Use dummy files: When enabled, the ONIX is processed but won't use real files. Lightweight dummy files will be used instead.
Distribution Options:
- Force Show in marketplace: The issues will be available in the marketplace.
- Uploads content on behalf of tenants: Issues will be shared with aggregated stores.
Required Fields:
- Name: Content intake name (3-50 characters, letters, numbers, hyphens allowed)
- Tenant ID: Up to 16 digits
- Tenant Domain: Must be a valid HTTPS URL (e.g., https://example.com)
- Tenant API Key: Must be a valid Farfalla API Key (format:
api-{UUID v4}) - Email: Must follow format
marketplace.intake.{customer}@publica.la - SFTP Username: 3-32 characters, alphanumeric and hyphens only
- SFTP Password: Auto-generated secure password (8+ characters with mixed case, numbers, and symbols)
SFTP Credentials: The system automatically generates both the SFTP username (based on your input) and a secure password that meets AWS requirements. IMPORTANT: Save both the SFTP username and the auto-generated password in 1password before confirming the form, as they will not be shown again after creation.
(deprecated) create it from scratch
Currently, this process is already performed automatically when creating the Onix Medusa intake.
By default, AWS Transfer Family only supports SFTP servers that are provide authentication via SSH Keys. Ingram didn't support this type of authentication, only using regular username and passwords. So we had to take some extra steps.
You can read about how to enable password authentication on AWS SFTP servers on this blog post.
This are the general steps that need to be follow to setup a new SFTP server.
Pay atention always use N.Virginia (us-ease-1) region to avoid auth problems and configurations.
-
Create a S3 bucket with all public access blocked. Choose any name, but for this documentation we are going to call it my-bucket-name. Take note of the ARN:
arn:aws:s3:::my-bucket-name. You can copy configuration for another bucket. -
Create an IAM Policy. We will attach this policy to the SFTP server, to give it permissions over the bucket. You can use the following data as a template.
{
  "Version": "2012-10-17",
  "Statement": [
    {
      "Sid": "AllowListingOfUserFolder",
      "Action": ["s3:ListBucket", "s3:GetBucketLocation"],
      "Effect": "Allow",
      "Resource": ["arn:aws:s3:::my-bucket-name"]
    },
    {
      "Sid": "HomeDirObjectAccess",
      "Effect": "Allow",
      "Action": [
        "s3:PutObject",
        "s3:GetObject",
        "s3:DeleteObjectVersion",
        "s3:DeleteObject",
        "s3:GetObjectVersion"
      ],
      "Resource": [
        "arn:aws:s3:::my-bucket-name",
        "arn:aws:s3:::my-bucket-name/*"
      ]
    }
  ]
}
- Create an IAM Role for the Transfer (using the select input) and attach the policy created above. Take note of the ARN. The "Trusted entities" value must be:
{
  "Version": "2012-10-17",
  "Statement": [
    {
      "Sid": "",
      "Effect": "Allow",
      "Principal": {
        "Service": "transfer.amazonaws.com"
      },
      "Action": "sts:AssumeRole"
    }
  ]
}
-
The next step is to create the username and password. Head to the Secrets Manager service, and create a new secret:
- Type:
"Other type of secrets". - Add the following secret/value pair:****
{
  "Password": "a_very_random_password",
  "Role": "add_aws_role_ARN_to_access_s3_bucket",
  "HomeDirectory": "/my-bucket-name"
}- Save the new secret with the format
SFTP/user_name(ofc, user_name is up to you!). It's very important that the prefixSFTP/is present!.
- Type:
-
S3 bucket lifecycle configuration is automatically set up to manage storage costs by cleaning up old files after 90 days. The system automatically configures:
- Deletion of current versions after 90 days
- Deletion of non-current versions after 90 days
- Abort of incomplete multipart uploads after 90 days
Note: This configuration is handled automatically - no manual setup required.
-
We are done! Try connecting to the SFTP server using the
username (without the 'SFTP/' prefix) and password, like you would do with any other SFTP.
Note: We are now using a single AWS Cloud Formation service for all the SFTP (sftp://s-c2bf45637e3e40ada.server.transfer.us-east-1.amazonaws.com)
Note 2: Remember to create the email address alias for that new intake, following the marketplace.intake.{customer}@publica.la format.
Links
- AWS Transfer Family
- CS Core Source Program document
- Enable pwd auth for aws transfer sftp
- Cloud Formation template